I recently decided to create a simple WiFi enabled DMX interface for controlling lights/lamps/spots as used on stages etc.. Most of these lamps come with a DMX interface which is based on the well know RS-485 BUS . As its very easy to convert between UART and RS-485 creating an interface based on the ESP8266 was the easiest approach.
Hardware
Parts
- Resistor 2.2k Ohm
- Resistor 10k Ohm
- Capacitor 100nF
- SN75176
- 6N137
- NKE0505SC
- Some pin headers
- A piece of PCB
- nodeMCU
Layout & Schematic
As I wanted the layout to be breadboard compatible, I decided to use Fritzing , skip proper schematics and directly create the layout. The picture here shows a very basic UART to RS-485 adapter with decoupling circuits.
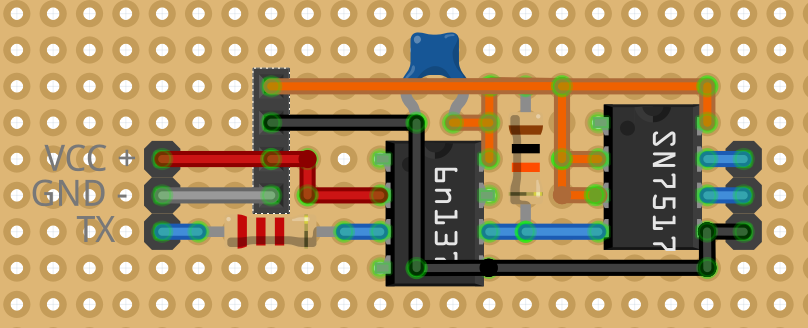
The layout seems to be missing the NKE0505SC. As I didn’t have the applicable footprint available, I quickly added a 4 pin row of sockets instead.
nodeMCU
The nodeMCU is a cheap, simple ESP8266 based embedded board. It is Arduino compatible, comes with WiFi and a few I/O pins and other interfaces - including UART, which I needed for this project. Some more information can be found here
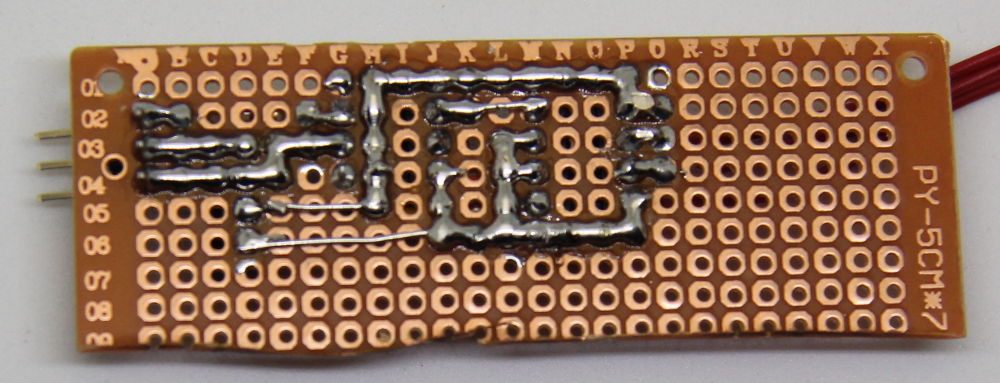
PCB

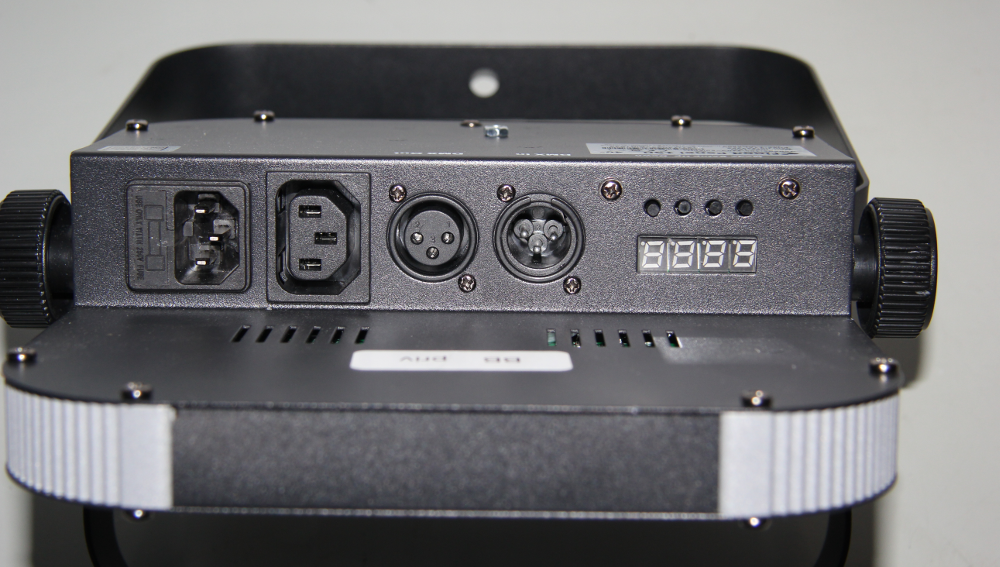
Lights
My test setup was a single Stairville LED Flood Panel 150 40° RGB .
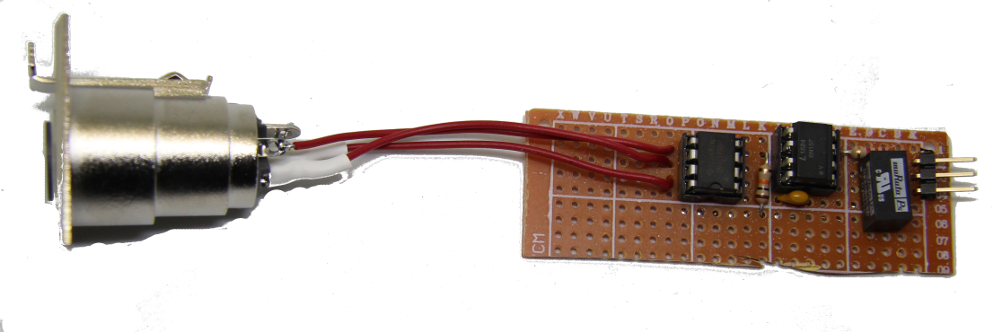
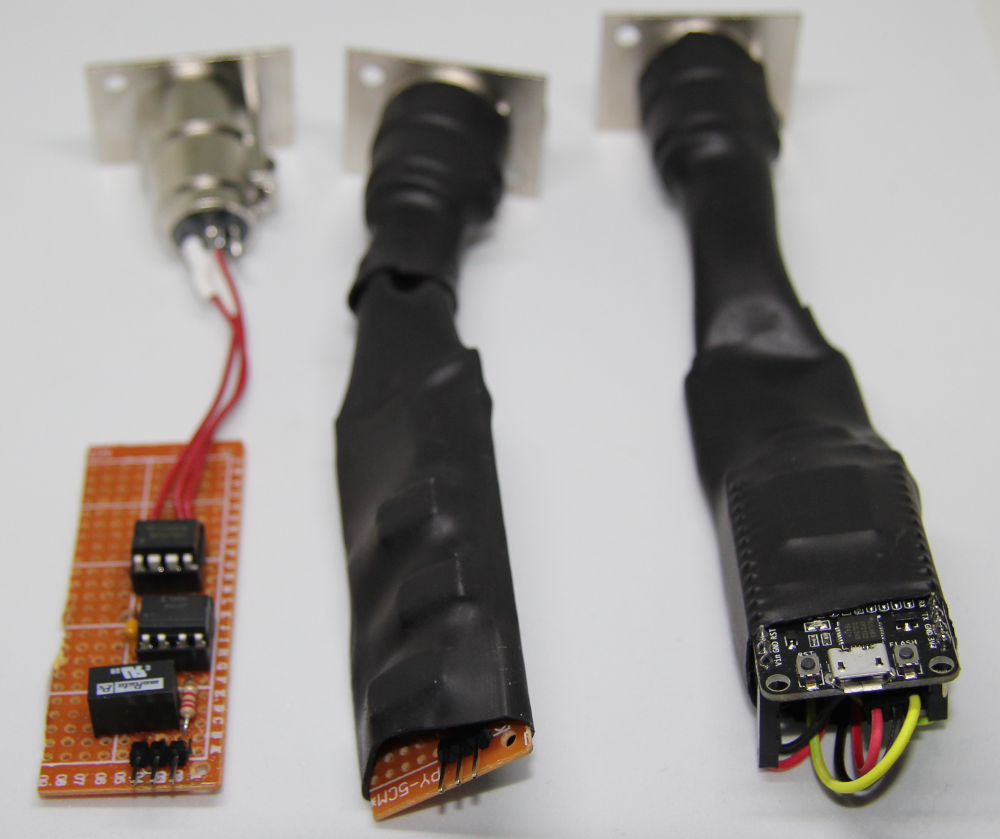
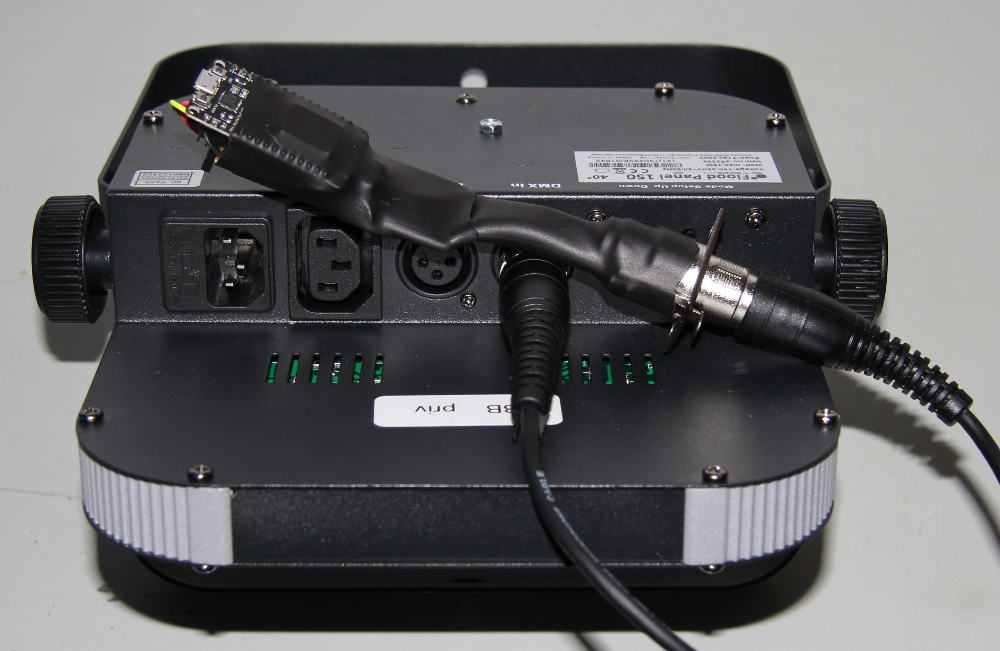
The Final Adapter
I decided to pack the adapter in heatshrink for isolation purposes.
Software
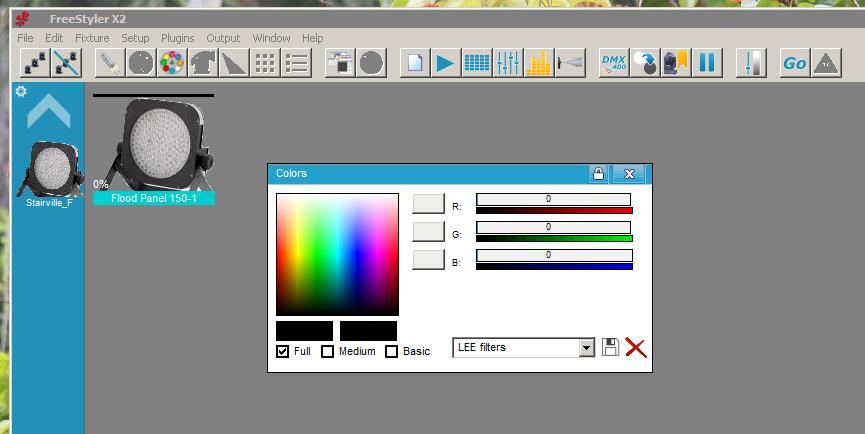
PC Test Run
As an initial test the adapter can be combined with a USB to UART cable (I usually work with ones from FTDI and just call them a “FTDI-Cable”). To do so simply connect the TX, GND and VCC lines from the cable to the adapter. I then used
FreeStyler
for an initial test. The circuit will work as a Enttec open DMX interface.
Firmware
The firmware is directly based on rstephan/ArtnetnodeWifi on GitHub . It’s sufficient to change the SSID and password in the example code to bring it up and running. I’d also recommend changing the node’s name, especially when working with multiple adapters.
The following is the original example code that comes with the mentioned library. All I changed was adding the nodename. It previously was a string set directly in the artnetnode.setName() function.
/*
Example Send DMX, transmit all received ArtNet messages out of the serial port.

Stephan Ruloff 2016
https://github.com/rstephan

*/
#include <ESP8266WiFi.h>
#include <WiFiUdp.h>
#include <ArtnetnodeWifi.h>

//Wifi settings
const char* ssid = "ssid";
const char* password = "pAsSwOrD";

//node name
const char* nodename = "Node 1";

WiFiUDP UdpSend;
ArtnetnodeWifi artnetnode;

// connect to wifi – returns true if successful or false if not
boolean ConnectWifi(void)
{
  boolean state = true;
  int i = 0;

  WiFi.begin(ssid, password);
  Serial.println("");
  Serial.println("Connecting to WiFi");

  // Wait for connection
  Serial.print("Connecting");
  while (WiFi.status() != WL_CONNECTED) {
    delay(500);
    Serial.print(".");
    if (i > 20){
      state = false;
      break;
    }
    i++;
  }
  if (state) {
    Serial.println("");
    Serial.print("Connected to ");
    Serial.println(ssid);
    Serial.print("IP address: ");
    Serial.println(WiFi.localIP());
  } else {
    Serial.println("");
    Serial.println("Connection failed.");
  }

  return state;
}

void onDmxFrame(uint16_t universe, uint16_t length, uint8_t sequence, uint8_t* data)
{
  // Send "break" as a "slow" zero.
  Serial.begin(56700);
  Serial.write(0);
  Serial.begin(250000);

  Serial.write(0); // Start-Byte
  // send out the buffer
  for (int i = 0; i < length; i++)
  {
    Serial.write(data[i]);
  }
}

void setup()
{
  // set-up serial for initial info output, hopefully DMX gear will not be confused.
  Serial.begin(115200);
  ConnectWifi();
  // use nodename variable
  artnetnode.setName(nodename);
  artnetnode.begin();

  // this will be called for each packet received
  artnetnode.setArtDmxCallback(onDmxFrame);
}

void loop()
{
  // we call the read function inside the loop
  artnetnode.read();
}
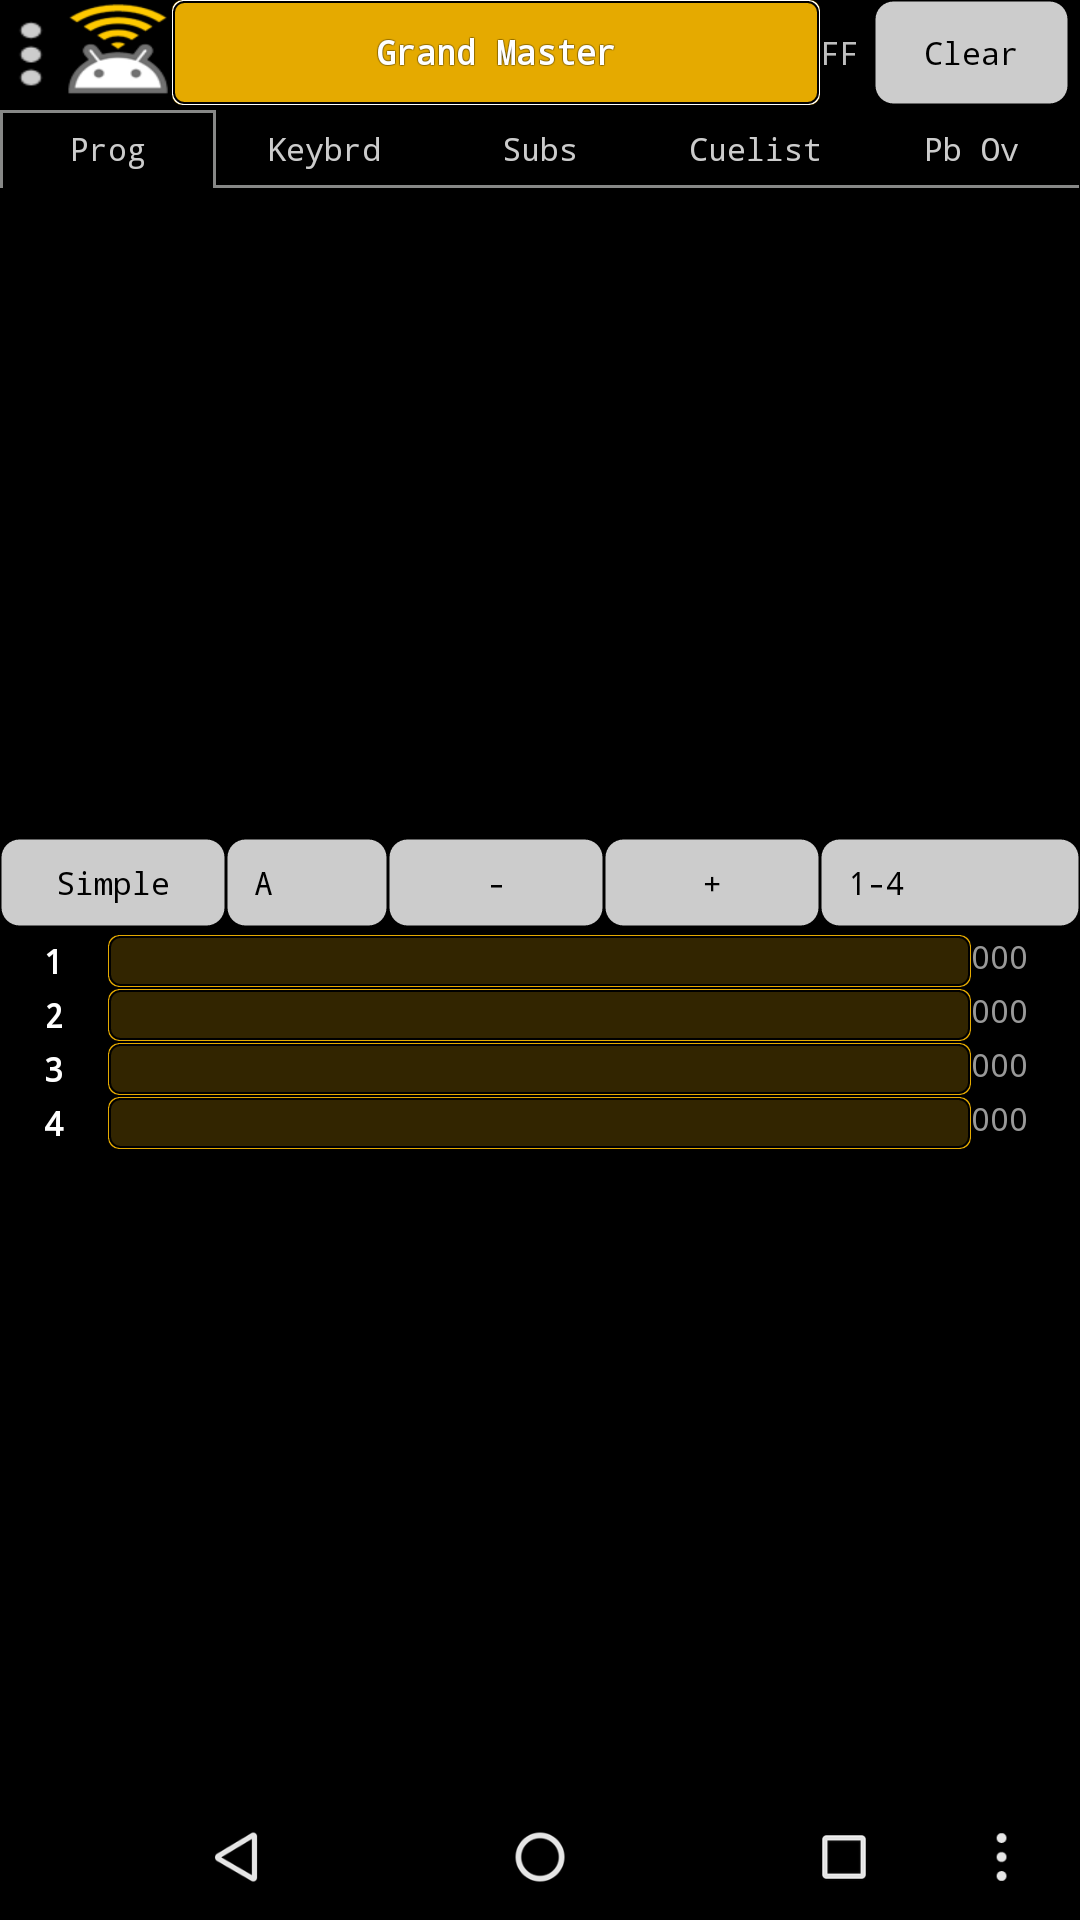
WiFi Test Run
As a master node I went for the Android App Art-Net Controller Lite . Here simply go to the settings menu, use the Try to find NODE button and enjoy!