Desoldering and Cleaning PCBs Before Adding Headers
Very often when working with embedded and IoT devices one will have the luck to find the footprint of a simple pin header. Soldering on pins and connecting jumper wires is quickly done. Sometimes though the vias / holes in the PCB will be plugged by solder and need to be cleaned before continuing. This post gives a short overview on how to clean up a header prior adding the pins. It will also cover the classical case of “the solder just won’t melt”. For the interesting part, scroll down to “Challenges”.
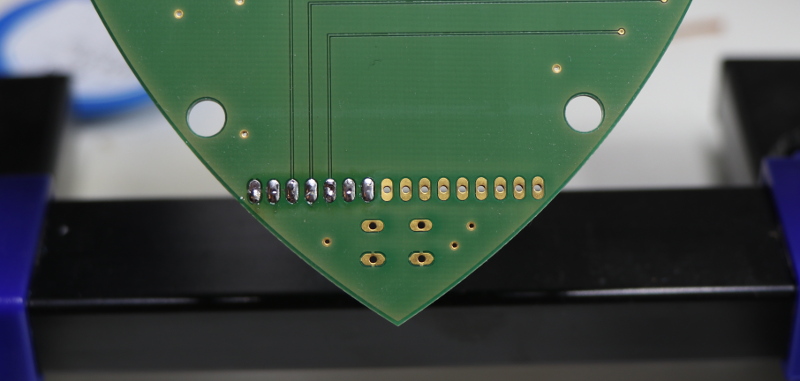
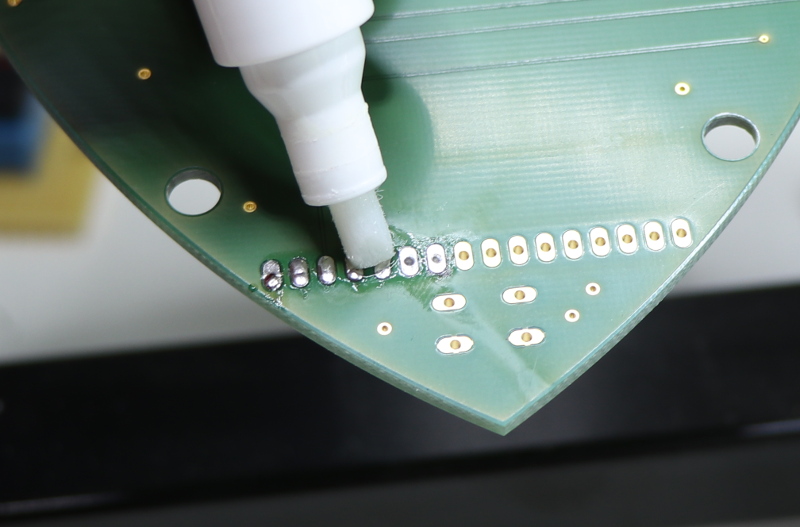
The following image describes the “problem” covered in this post.
There are a few different ways to clean headers as shown in the picture. All approaches will obviously require a soldering iron.
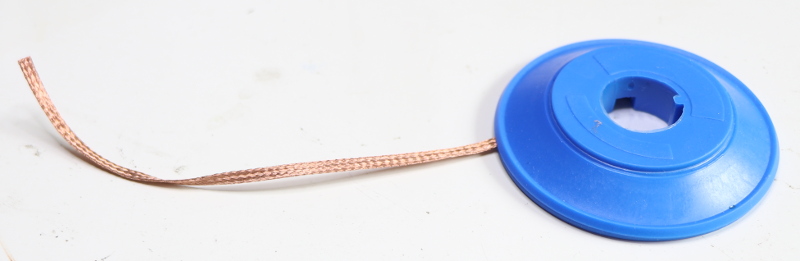
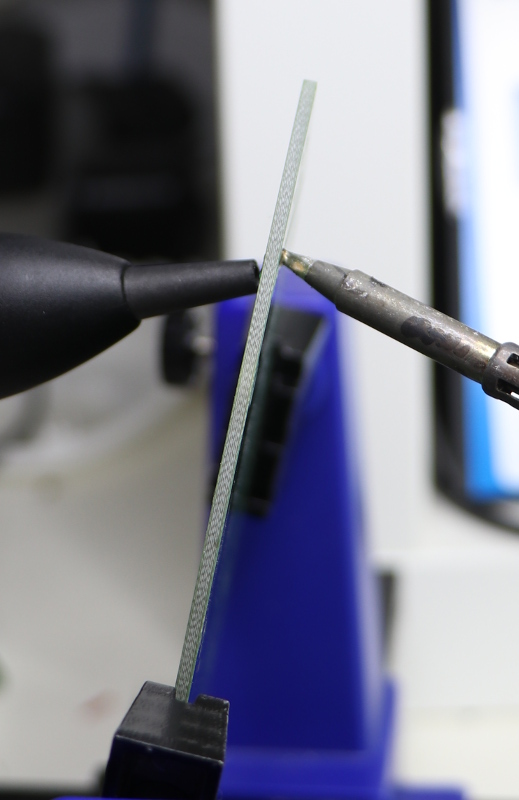
Solder Wick
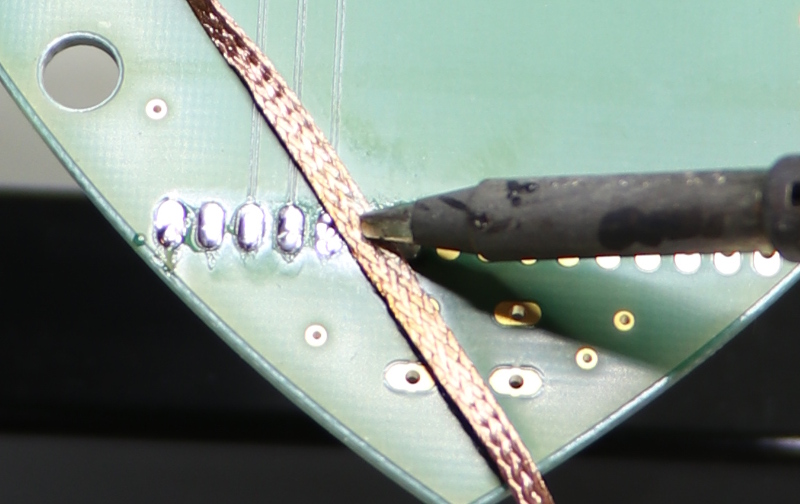
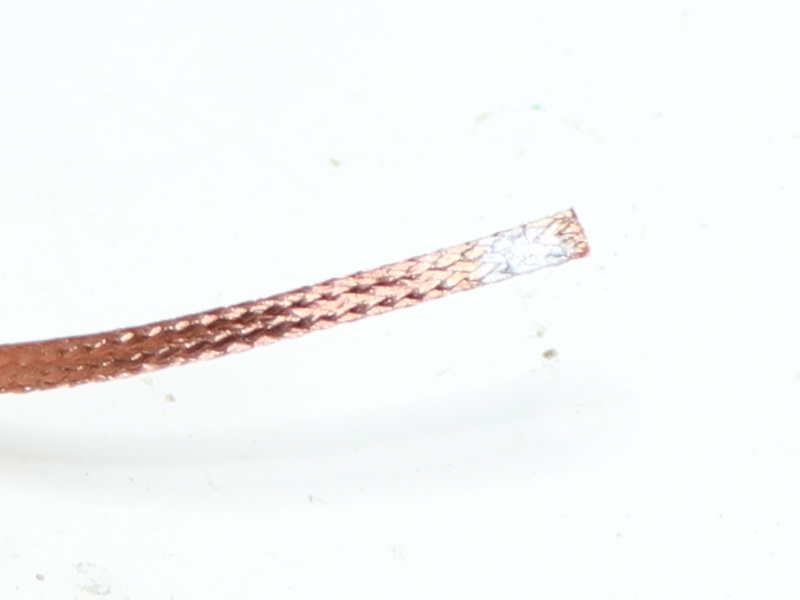
Solder wick is a very fine mesh made up of copper wires and is coated in flux. It is able to simply suck up liquid solder, a basic usage the capillary effect. In practical use it is placed between the PCB / solder and the hot iron. When the solder is molten, it will flow into the wick.
 |
 |
While the wick is perfect for cleaning up surfaces, it does not help a lot with actually removing the solder from the via. So I prefer to use it to remove excess solder or to clean up afterwards.
If necessary one might also be able to miss use a piece of wire.
Warning: Copper is a great heat conductor! When having to hold the wick in place with your fingers, you will burn them (part of the job I guess…). Try to hold it with tweezers
Vacuum Pump
Vacuum pumps or de-soldering pumps are small plastic or metal pipes with a spring loaded suction mechanism.
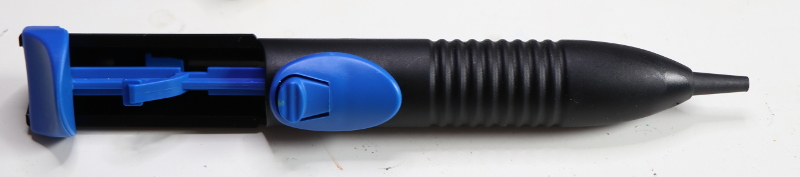
Clearing vias with a vacuum pump is usually a three hand job. The PCB will have to be held upright, The soldering iron on one side of the PCB, the pump on the other side.
As soon as the solder is liquid one presses the release button and it is sucked from the hole.
The Seriously Really Ugly Way
Warning: Use of this approach is not recommended and it’s dangerous
When not having the right equipment, I sometimes travel with a soldering iron and solder for emergencies but never have a vacuum pump or wick on me, I stick to an ugly trick. I tend to get the solder into liquid state and then carry on heating it for a short while. I then simply forcefully shake the liquid solder off. Although you’ll have liquid solder flying through the room, it will end up on the carpet or on the wall but will have left the PCB.
Challenges
Solder is a compound made of different soft metals and usually contains a certain amount of flux. The flux will evaporate during the soldering process and leave behind an even harder solder. Solder is simply not made to be molten again and again. The following table from Wikipedia shows a few different solder types.
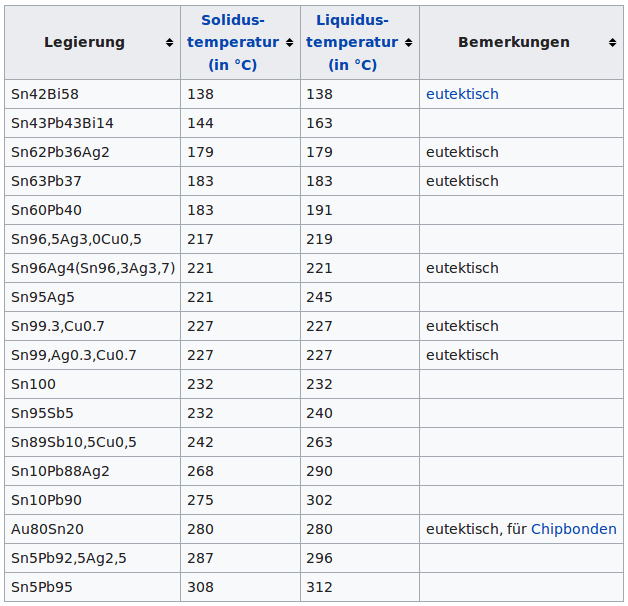
As you can see, different types of solder melt at different temperatures. Depending on the actual use case, industrial soldering will usually use solders melting at higher temperatures. Prior soldering the used components are dried, so that there is no moisture in the packages which might cause damages during the heating process. Combining this, with loss of flux can turn melting the solder into a notable issue.
Above this the PCB itself might be an actual issue.
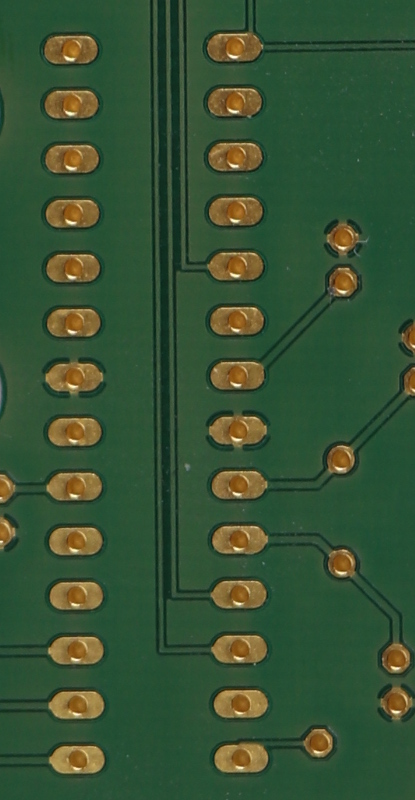
The image above shows a simple DIP/DIL footprint. One can easily see the golden pads and the vias/holes in the middle of them. The lighter green shows areas where there is copper beneath the coating, the darker areas where there isn’t any. The fact that most of the PCB is in the lighter green shows us, that there is a big copper plane all over the surface. In many devices these planes are used for cooling reasons. As powerful microcontrollers can generate significant amounts of heat, the copper is used to distribute this energy all over the PCB and create a large cooling surface. This is very often combined with a large amount of vias, yet again increasing the surface for cooling purposes. There even are PCBs with a metal core which are able to dissipate even more heat.
Wanting to heat up solder, the cooling effects of the PCB obviously work against us.
Tricks
Rule one when desoldering something is: Patience! It won’t be as quick as you expect, it won’t be quite as easy and you will probably burn your fingers when things become more complicated.
The easiest approach is to simply work at a slightly higher temperature than you would use when soldering. In many situations this can be sufficient.
If this doesn’t work, one should add some extra flux.
Flux either comes as a liquid in pens or as a paste. From my experience the liquid flux is by far cleaner. When using the flux one simply covers the solder with some flux and then uses one of the approaches above to remove the solder.
If extra heat and flux don’t do the job, the final solution is: more solder! Adding some low temperature solder on the one hand adds some fresh flux and the other hand optimizes the heat distribution on the solder you’re trying to remove. Also, when the old solder melts, it will mix with the fresh solder and reduce the overall melting temperature. It might take a while, but it will do the job!
P.S.
What I didn’t cover in this post: There are de-soldering stations, which consist of a hollow tip soldering iron with an electrict suction pump. As such it will both melt and suck up the solder.