Gameboy? Gameboy!
I recently got to make a new, fun badge for H2HC, which turned out to be a custom GameBoy game. This post gives a quick and easy insight into the how! If you just want to play, go here.
Overview
H2HC the game is a tiny adventure, depicting a visit at the Hackers to Hackers Conference in Sao Paulo Brazil. It gives the player a chance to visit an imaginary conference and enjoy a virtual visit in Brazil. The game contains the venue, both conference and Hotel and multiple stops throughout the event.
Tools
GB Studio
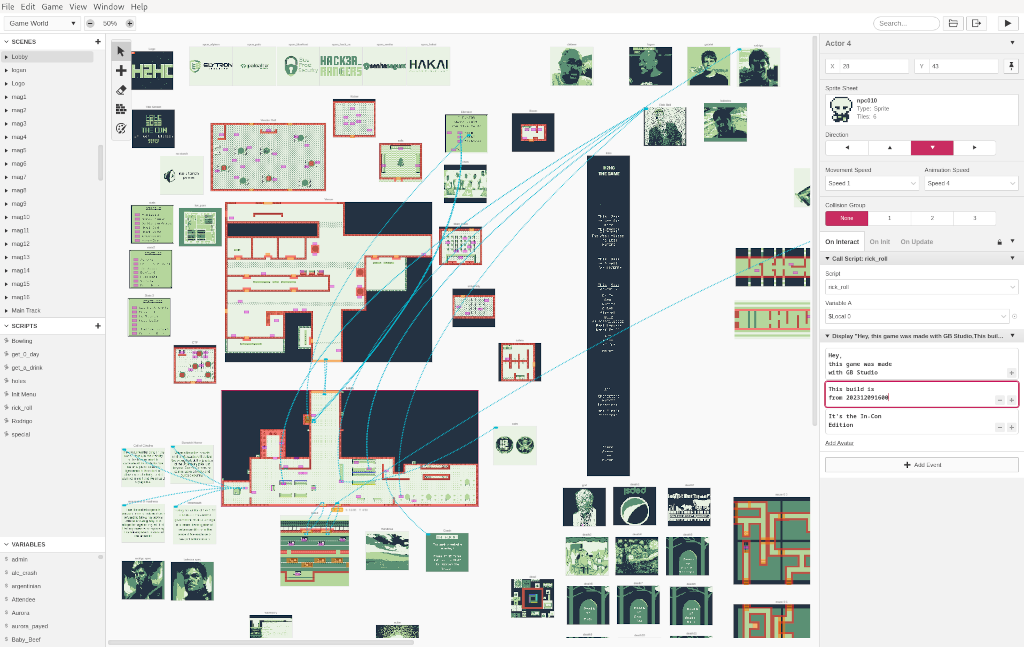
GB Studio is an editor for …GameBoy games… . It’s a plain and simple GUI editor. You add a scene (map), then you draw the borders and then you start adding actors and Triggers. The actors react to being enabled (A Button) and the Triggers have on-Enter and on-Leave events. Dialogs, menus scene changes all run out of the box. A few things seem complicated, until you think about them. Like a button on the screen is actually a sprite/actor technicall looking two directions, one being the pressed image, the other the unpressed. Backgrounds are limited to a certain complexity, so you need to work with a proper Map editor. For logos etc. you can use the Logo format, which is fullscreen, but a proper indidivual image. The project is nicely documented and offers a really easy start. My main challenge was the limit of 20 actors per scene. Instead of shifting actors that where off screen dynamically and doing a little, I decided to simply split the scenes into multiple smaller ones. I.e. separating halls from rooms. I had a similar issue with the amount of 30 triggers, but in my case I needed to cover multiple doors on the same wall, with the same action, thus I just used a bigger trigger area. Also, being able to perform relative movement, nudging a player a certain direction is trivial.
Tiled
Tiled is a tiled based map editor. Thus you have a grid, you have tiles and you draw. Having multiple layers makes working on the floors, the walls and the interior is pretty easy. All you need is a tile set. Not being a GFX guy, mine are pretty simple, probably lame, but it does the job.
Aseprite
Asperite has by more features than I used. It’s in general an editor for pixel graphics and supports various features for generating animated sprites etc. I went for it, as the GB Studio documentation contained a colour pallet for it and I simply needed something to work with. Having spent a few ours with it, I’m pretty happy. Aseprite also does a reasonable good job, when pasting a colour image and having it modify it for the GB colours.
FlashGBX
FlashGBX is the tool I used for flashing the cartridges and also for extracting the images from the gameboy camera. It’s quick, simple and extremly stable. I managed to flash 120 cartridges with three instances running in parallel on the same laptop, without issues. I’ve honestly never managed to do so with any commercial flash tool. It comes both with a GUI and command line interface. For the hardware part, I used a GBxCart RW. You can also use it to create backups of actual gameboy games and saves.
GBxCart RW
The GBxCart RW is, stupidly said, a USB-C to gameboy cartridge adapter.
It’s important to note, that the connector might be a little slimmer than the cartridge and so you’ll have to realign it a little.
Getting Started
Due to having been ask for examples on how the game was made, here a few little insights. Please remember, I’ve only used these tools once, so they’re far from good, and only my dirty, hacky, approaches.
The ressource I started with is GB Studio Central. It’s got a stack of examples and ideas how to solve most tasks.
First Map
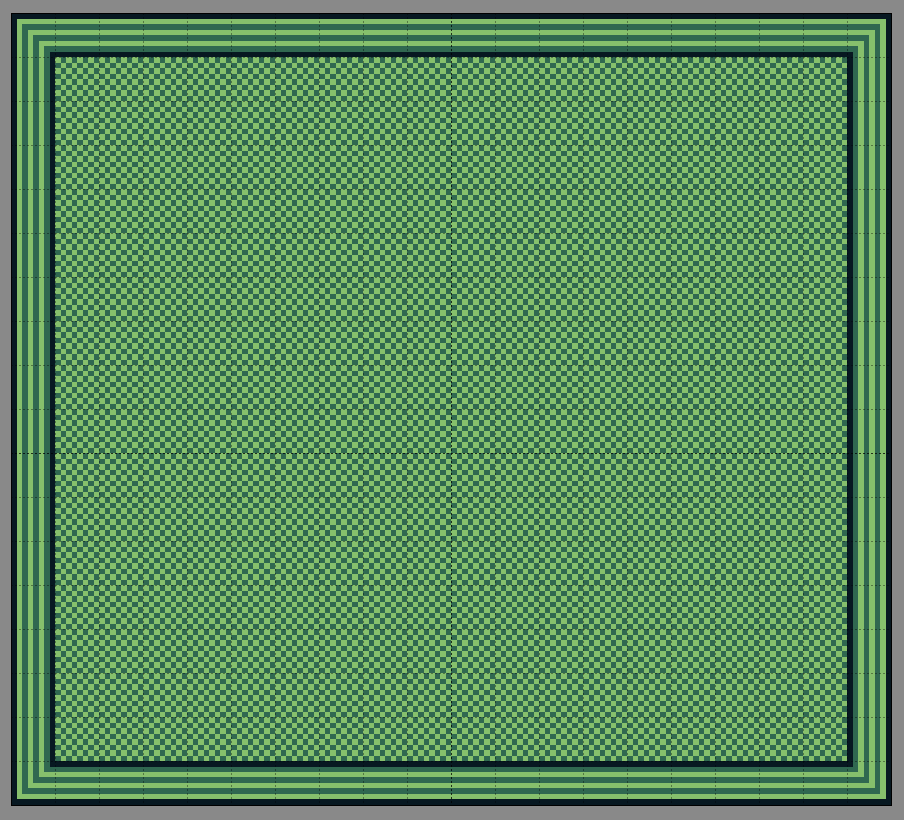
Use Aseprite to create a simple floor tile, like this one. It’s simply 8x8 pixels, thus enlarged a little bit for this post.

Then in Tiled you can create a new tilset, add the floor tile, then create a map, create a new layer and call it floor and fill. Then you do the same for walls and you’ve got a basic setup.
Then go for the next layer with all your interior. The layers help you fixing, shifting and cleaning things up. I.e. when you remove a chair, you still have a floor below it, that said, it also allows you to use transparency.
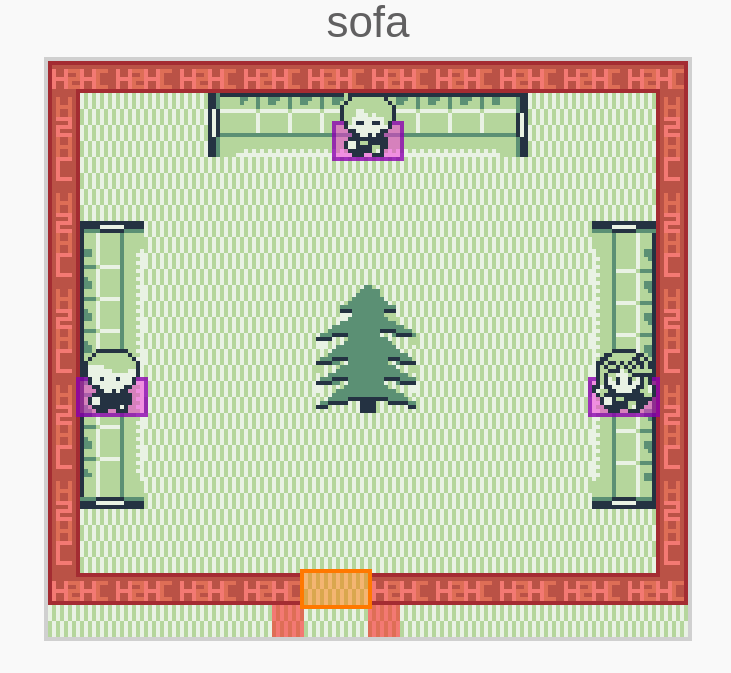
Basic Room in GB Studio
In GB Studio go for add Scene, and select applicable image. It will have to be in the assets/backgrounds folder. Then adding a few actors, it’s done.
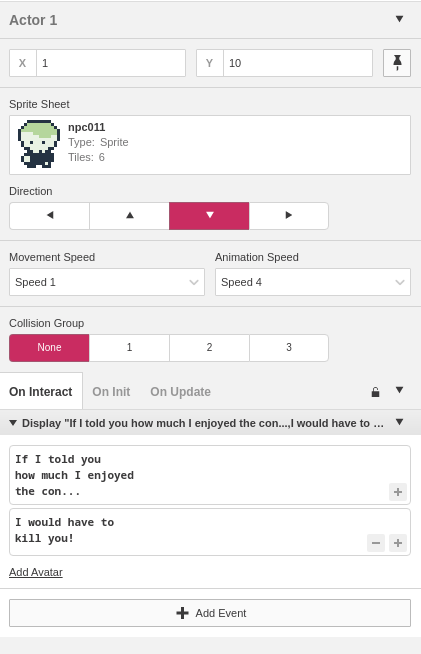
Showing Chats
As easy as adding a single Display Dialogue event.
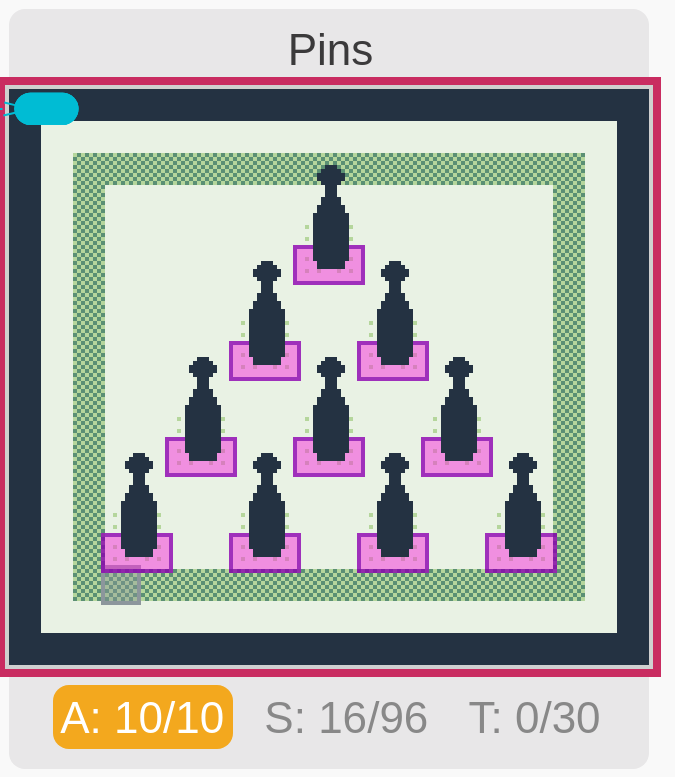
“Dynamic” Displays
The pins in bowling alley are actually by far more static than one might think. Each pin is a single actor. Bowling itself is a combination of a random value and a switch block. For me it was enough to have a few different caes available, as such each case is a different result, hiding and showing different actor pins and showing a specific message.
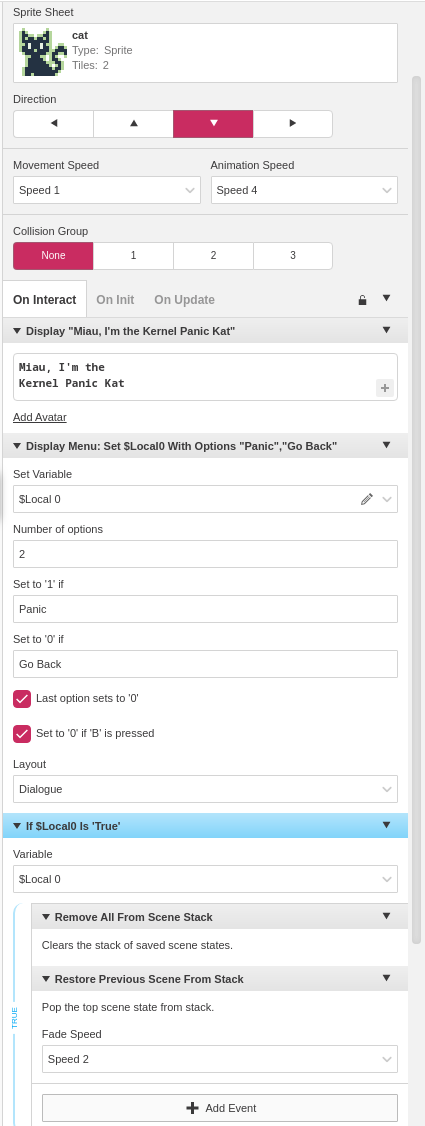
Kernel Panic Kat
During the first con day, I was shown a small bug in the game, I had accidentaly placed an event after the end of the else block, which should have been in there. While shifting the blocks I made it worse, by pushing a “change scene” call, before the push to stack event, thus having a pop from an empty stack. So I had a kernel panic in the game. After fixing the fix, and adding the guy who found the issue as a character in the game, a friend had the idea to compare the error message from emulator with an actual game boy. Result: the Kernel Panic Kat. It’s a simple actor flushing the stack and then doing a pop to create the Kernel Panic.
Music
Not my part. A good friend of mine Torben made music tracks for me and will hopefully share a few insights into his work here, later.
And honestly
Just open GB Studio an give it a try! :)
Notes
NPC
NPCs will go where you want them to be using the “Actor Move to” or the “Set Actor Position” commands. Move to will make the NPCs “walk” to to target position, Set just change the coordinates. For Move it’s important to note that there is no default way finding algorithm, thus the NPC will walk in a triangle. Either vertical or horizontal first and then the other part. If the character collides on any of the two streches, it will just act as if it has arrived correctly and continue. Thus probably not doing what expected. The solution for roaming/ambient NPCs is simple, work with specific waypoints around the map and disable collisions, this way the player will not interfere. I chose a door, where the NPCs hide for a certain amount of time and then reapear for their typical route.
Showing Screens/Logos/Banners
The easiest solution is to use “Store Current Scene on Stack”, then use “Change Scene” and then switch back to the old scene using “Restore Previous Scene From Stack”.
Copy & Paste in GB Studio
You can paste before or after an event, thus you need an event there in the first place. Otherwise you can replace a full script.
Max Mapsize
| Parameter | Pixel | Tiles | Comment |
|---|---|---|---|
| Tile Size | 8 x 8 | 1 | |
| Screen | 160 * 144 | 20 x 18 | Logo Size |
| Background Max Width | 2040 | 255 | |
| Background Max Height | 2040 | 255 | |
| Background Max Width x Height | 1048320 | 131.040 | |
| Max Width at minimal Height | 2040 | 255 | Max Width for Side Scollers |
Debian 12 Update
Since my update to Debian 12 / Bookworm, there is an issue launching GB Studio. The –no-sandbox parameter seems to be necessary to fix the issue. Sadly, it’s a known bug with no actual fix :-( Funnily on my freshly installed Bookworn it works like a charm.